A journey though learning how to weave on a rigid heddle loom sharing tips and techniques, resources, and projects along the way!

Loom

Loom
Showing posts with label weaving. Show all posts

Sunday, August 15, 2021

WET FINISHING

This brief article contains links to the two extensive articles on wet finishing. Wet finishing is an important process in creating woven cloth. When the cloth comes off the loom what you have is a net of yarn. The process of wet finishing converts the net into cloth. The yarn relaxes, the weave pulls together, and when dry the result is woven cloth. All weaves using any yarn fiber should be wet finished. Some will say that acrylic does not need to be wet finished. Acrylic will relax and the weave will come together just as a weave of any other fiber.  There is a definite positive difference before and after wet finishing. 

 Each of these articles has step by step directions to follow: 


ARTICLE ONE - WET FINISHING BY HAND

https://rigidheddle.blogspot.com/2018/04/wet-finishing.html


ARTICLE TWO - WET FINISHING BY MACHINE

https://rigidheddle.blogspot.com/2020/01/wet-finishing-by-machine.html

 When wet finishing by machine timing is critical - especially time in the dryer. 


Wednesday, October 21, 2020

CHANGING WEFT YARNS WHILE WEAVING

I am going to talk about two different processes in this article about changing weft yarn as you are weaving. There are two main reasons why you would do this. One is if you want to have weft stripes - horizontal stripes of different colors in your finished weave. The other is going to happen much more often - you are weaving and your shuttle runs out of yarn.  Now you have to start a new shuttle with that same yarn. I will take each of these separately.

 FIRST - COLOR YARN CHANGE FOR STRIPES:

 When you want to make weft stripes in your weave, you need to be able to change from one color yarn to another while you are weaving and you want the change to take place at a selvedge and you do not want the change to show. This is how I do that. I am right handed and feel most comfortable working at the right selvedge so what I am showing here is worked on the right side of the loom. There is no reason why you could not do this on the left side of the loom or alternate side to side if you want to. How long you make your stripes is up to you. How to determine how many rows of weft each stripe is, is simple. Get a "click counter" - these are sold for knitting. It is a push button counter - push the button and the number on the counter advances by one. They also have a reset to set the counter back to zero. These should not be expensive. I have one that is plastic and small.  If you decide you want each stripe to be 25 rows, with the counter set to zero, click once each time you pass the shuttle to weave a row. When you get to 25, stop, reset the counter, make your color change and weave another 25 rows.  You could do this with a paper and pencil and put a line every row - and count the lines.  The clicker is easier. 

So lets begin:

In this BLACK yarn is the OLD COLOR and BLUE yarn is the NEW COLOR.  I will refer to these as OLD AND NEW.

1)  You are ready to make your new stripe. You have woven the length you want your current stripe to be and you want to now start a new color stripe.  Take your shuttle with the OLD color yarn which you are now weaving with - and before you pass it through the shuttle CUT the yarn leaving about 7 inches left hanging down the side of the selvedge you are at. Open the shed. Put that tail of yarn into the open shed and lay it down on the warp - at a 45 degree angle up toward the other side. Now take that tail and tuck it down between two warps to under the warp under the loom.  Go into the two warps that are about an inch into the warp. You will be making the color change in the first inch of the warp from the selvedge.

The photo above shows the OLD weft through the warp and hanging down. Give it a pull while holding the weft at the selvedge warp to get it nice and straight and even - but keep it at the 45 degree angle.

2) Take you shuttle with the NEW weft and put it through the same open shed from the same direction. Let a tail stick out the selvedge that you went in from. You want a tail about 6 inches (just so you have some yarn to work easily with - don't be stingy with the yarn - a little wasted yarn makes somethings a lot easier to do. Take that tail INSIDE the open shed and tuck it down between two warp yarns to below the warp under the loom. Here you see that the warp went down between the fourth and fifth warp threads - you don't want to be too close to the end warp but close enough so that this change will be hidden when you continue weaving

 Here you see NEW yarn going down between two warp threads and below the warp. Now this is the important part and what will HIDE the change - though when you do it you will say - that will never hide the change I can see it clearly right in front of me! Well - give it a chance. TAKE THE TWO YARNS - OLD AND NEW AND CROSS THEM SO THAT THE OLD YARN IS GOING TO GET PUSHED TO BE NEXT TO THE OLD YARN IN THE ROW BELOW IT AND THE NEW YARN WILL BE NEXT TO THE NEW YARN IN THE ROW YOU ARE GOING TO WEAVE ABOVE IT. Pinch the warp at the selvedge and give each tail of yarn a little tug so that it is up at a 45 degree angle toward the other side and so that it becomes slightly snug. Close the shed by putting the heddle in NEUTRAL.

This is what your two tails look like under the loom.


  3) BEAT FIRMLY WITH THE HEDDLE. Push both yarns into the weave and you want the OLD yarn to be on top of the OLD yarn in the row before! 


And you are thinking, I CAN SEE IT! I CAN SEE IT!  Just wait!

4) Keep weaving. The yarn in the photos is thin yarn - #3 knitting yarn. A thicker yarn blends even better - but this works with thick or thin yarns. Here, below, is what you have after a few new rows of NEW yarn.


 And you are still thinking - who is he kidding, I can still see the change!  

5) Take your fingers and put your thumb at the selvedge on the NEW yarn, pinch it gently to your fingers under the NEW yarn (SHED IN NEUTRAL) and just manipulate the NEW yarn at the edge down slightly to close in what may be visible. Get it even and straight - get the NEW yarn to move into line with its first row.  Now, KEEP WEAVING the NEW YARN.

 I don't see the change any more. YOU know it is there. If you look really closely you can see somewhat what you did to make the change. Give this when it is off the loom and wet finished and they will not see the change. If you point it out to them, they may see it. But it is highly unlikely. 

When you are ready to make the next stripe do the same thing all over again. If you are changing with two stripes in alternating of the same colors or if you are putting a different color into every stripe, it will still work. 

When you take this off the loom, wet finish. I don't care what fiber(s) it is - always wet finish. Once it is completely dry you are going to eliminate the evidence. Lay the cloth flat with the tails facing you. Take hold of one of the tails and hold it up - not tight but to keep where it meets the cloth up from the rest of the cloth. You are going to snip (cut) the tail off. I do this with what is called a cuticle scissor. It is small and has a small pair of sharp blades that are curved UP.  This scissor in the photo is 3.5" long. The sides at the finger holes are 2" apart. You should be able to find these in a pharmacy or pharmacy department of a discount store - often with the cosmetics or nail care.  I happened to buy these a Farmer's Market in the Amish area of Lancaster County, Pennsylvania for 3 pairs for $5.

Take the bottom of the curve just above the cloth but close to the cloth - and clip off the tail. JUST be careful not to clip anything that you should not be cutting! The yarn - after wet finishing is all part of the weave and will not come undone. 

YOU ARE DONE changing weft colors when weaving.

 ++++++++++++++++++++++++++++

SECOND: STARTING A NEW SHUTTLE WITH THE SAME YARN IN THE SAME COLOR

Starting a new shuttle with the same yarn is even easier - and is done the same way. The difference is you are going to do this change longer and toward or in the center between the selvedges (end warps).

THIS NEXT SECTION IS AN EXTRA - AS THIS COMES UP ALL THE TIME AS A RELATED QUESTION:

When you start to see that your shuttle is running out of yarn, if you have a second shuttle the same length, stop weaving and go and wind more yarn on that shuttle. IF your weft is a solid color weft or a patterned weft that is random and it does not matter if you continue with weft from another section of the yarn - just wind one shuttle from the end of the ball where you left off winding the first shuttle. 

 IF your weft is variegated colors or patterns of colors - or you have a self striping weft and you want to continue with the matching part of the yarn that continues where your shuttle weft ended,this gets a little more time consuming. Ideally for this type of weft, if you have several shuttles the best thing to do is when you wind the first shuttle when that shuttle is full, you continue to wind the rest of the shuttles right then. After winding the first shuttle - (let's say you have 4 shuttles to use) - you would mark that first shuttle #4. Keep winding shuttles - the next  shuttle is marked #3. The shuttle wound after that is #2. The last shuttle you wind is #1.  You will start weaving with SHUTTLE #1. The next shuttle you will use when #1 runs out is #2, and so on. 

Do you see that you are using these shuttles in the reverse order in which they were wound? What this does is it takes the yarn left on the ball or skein and when starting to wind with that end it puts it in place to be the very last of the yarn when that shuttle is emptying.  By reversing the order of the shuttles you wind, you will match up the end of one shuttle with the yarn at the start of the next.  

BUT what if you don't have a lot of shuttles.  What you have to do then if you have only one or two shuttles is to go to the ball of weft yarn you wound your first shuttle with and wind your shuttle again - or a second shuttle if you have one - and when you are done winding - you are going to have to take the yarn off that shuttle and wind the shuttle again this time starting to wind with what was the very last wind you did when you just wound that shuttle. (Confusing - yep - follow it through - you just wound the shuttle to start weaving again because your shuttle ran out of weft. The new yarn you will start with is the wrong variegated or self-stripe to match where your weft ran out. BUT the yarn that you started winding with is exactly what you want to have come off that shuttle first.) So to make this easier - you need something to wind the yarn from that you just wound on the shuttle. A piece of cardboard - another shuttle - that is easiest - anything good to wind yarn around.  Get the end of the yarn from your just wound shuttle and start winding off the shuttle onto the cardboard - whatever - make sure that this yarn end will go under the rest of the yarn being wound on. Once all the yarn is off your shuttle take the end that came off the shuttle last and start winding a that same shuttle again - starting with that end.  You will be reversing the order the yarn was on the shuttle when you wind now.  What was the weft end on the ball that you started winding with will now be the end now that you will start weaving with. That is the end that matches the end of the weft that ended your first shuttle - and what you need to match to start weaving again.  As I said above, this is only needed if you do not have a solid color weft - as with a solid color weft - any part of the yarn will match where you ended up when the shuttle ran out of yarn.

GET READY TO START A NEW SHUTTLE

1) The weft is just about run out on your shuttle. You want enough OLD shuttle yarn to go 3/4 of the way across the shed with enough for a tail of at least three or four inches long.  You just put your shuttle through, and if you see that there is not enough weft to weave another row, get the rest of the weft yarn off the shuttle and cut it so that you have weft 3/4 through the open shed and the extra for the tail.  TAKE THE END OF THE YARN FROM THE OLD SHUTTLE YOU JUST CUT OFF AND PUT IT THROUGH TWO WARP THREADS DOWN BELOW THE WARP UNDER THE LOOM.

 What you see above is how your shed should look with the end of the weft yarn from your shuttle after following STEP 1.  (The white paper is under just to make the yarn more visible in the photo.) Notice the yarn is up on a 45 degree angle - with the tail under the warp. 

2)  Take your NEW shuttle and pass it through the same open shed from the same side you went in with the end of your last, now empty, shuttle. Bring the shuttle all the way out of the shed on the other side - but leave its end coming out of the side it went into the shed. Put your new shuttle down and out of your way. TAKE THE END OF THE NEW SHUTTLE YARN AND TUCK IT DOWN BETWEEN TWO WARP THREADS ABOUT TWO INCHES  BEFORE WHERE THE OLD SHUTTLE YARN IS TUCKED DOWN BELOW THE WARP. Make sure the weft tail is about four inches down below.


Above you see the NEW and OLD weft tucked down below. At this point if you followed Step 2, this is how your weft should look. Note again that the weft is up at a 45 degree angle - and the tails are below the warp. 

3) Before you beat, take hold of the OLD yarn tail and pinch the end warp it comes over and give a tug on the tail. Do the same with the NEW yarn tail - this time holding onto the tail under the warp and give a tug to the weft coming our of the shed that you are going to be weaving with soon. Make sure the two weft yarns in the shed CROSS OVER each other. This locks them in. Put your heddle in NEUTRAL!

NOW BEAT PUSHING THE TWO YARNS TOGETHER AND INTO THE WEFT ROW BELOW!


Above the shuttle is off to the left side of the loom. The shed is closed - heddle in neutral. The new shuttle yarn has been started. The two yarns are together in the weave where the change was made. It has blended together. The change is not visible. 

4) KEEP WEAVING! You are weaving with the new shuttle. If your shuttle runs out again - do the same thing! 

When you take this off the loom, wet finish. I don't care what fiber(s) it is - always wet finish. Once it is completely dry you are going to eliminate the evidence. Lay the cloth flat with the tails facing you. Take hold of one of the tails and hold it up - not tight but to keep where it meets the cloth up from the rest of the cloth. You are going to snip (cut) the tail off. With several changes of shuttles you will have several tails to clip off. Use the curved scissors I recommend above. Again, do not cut anything that is not supposed to be cut!

AND YOU ARE DONE! You have ended the OLD shuttle and started a NEW shuttle with the same yarn. Do this as many times as the shuttle runs out.


Saturday, January 11, 2020

WET FINISHING BY MACHINE

In April 2018, I wrote a wet finishing article. In that article I wrote all about wet finishing - BY HAND. As at that time, that was my preferred method. I had some rather nasty experiences using the washing machine and dryer to wet finish and decided that to avoid problems that could ruin all of the work that went into creating the weave - why take any chances. I still believe that wet finishing by hand is a preferred method - especially for some very delicate weaves or fibers that are more likely to shrink or felt when felting is not desired.

I have heard from so many weavers on the various weaving groups that I am on talk about how good wet finishing by washer/dryer can be - so I decided I would do some experimenting and come up with a method that works well - works quickly - and so far has not ruined anything I have tried it on.

What you will need -

WASHER  (top load, front load, agitator, no agitator - it should not matter. I am using a top load with agitator.

WASHING BAG - fine mesh bag with a zipper or draw string. I have two - a medium size one, Pictured here - for scarves and small to medium weaves - and a large one for shawls and table runners.


SOAP I am still using BABY SHAMPOO. It if it is delicate enough for a baby it is delicate enough for what we weave on our looms.

LAUNDRY SOFTENER I am still using Downy.

DYE CATCHING SHEETS  Use with any yarn that might have colors that will run.

CLOTHES DRYER

DRYER BALLS  Wool or plastic balls with nubs that are made to be tossed into a dryer.

SOFTENER SHEETS (optional)

TABLE OR FOLDING DRYING RACK  Pictured is what I have been using - purchased at Costco and used with the wire shelf that I talk about in my first Wet Finishing article.


Here is what I have come up with:

1. SET WASHER TO DELICATE.

2. SET TO MEDIUM LOAD TO HALF FILL WITH WATER - I USE COLD WATER. WARM TO HOT WATER CAN SHRINK NATURAL FIBERS. AGITATION IN HOT WATER WILL FELT WOOL AND SOME OTHER NATURAL FIBERS.

3. SET WASHING DIAL TO EXTRA LIGHT (on our washer this washes, rinses, and spins for about 20 minutes). This should be the LEAST of the wash time settings.

4. START AND FILL WITH WATER.

5. ADD A SMALL AMOUNT OF BABY SHAMPOO.

6. ADD SMALL AMOUNT OF DOWNY TO SOFTENER CUP (per washer instructions).

7. PUT WEAVING IN WASHING BAG TRYING TO NOT GET IT AS EVEN AS POSSIBLE AND CLOSE BAG.

8. PUT WEAVING BAG IN WASHING MACHINE INTO WATER.

9. THROW IN DRYER SHEET.

10. START WASHER.

Your washer may have different ways to set these settings. The most important part is to let this wash in the machine for no more than 20 to 30 (AT THE MOST) minutes.

11. WHEN DONE TAKE OUT OF WASHER AND OUT OF BAG IMMEDIATELY.

12. PUT WET WEAVING INTO DRYER - LAY IT IN SO THAT IT IS AS FLAT AS POSSIBLE IN THE DRUM.

13. SET DRYER TO DELICATE.

14. SET DRYING TIME TO THREE (3) MINUTES (this is vital). NO MORE THAN 2 TO 3 MINUTES TOTAL IN DRYER! I HAVE BEEN FINDING THAT TWO MINUTES WILL LEAVE THE CLOTH LESS DRY WHICH IS GOOD. YOU WANT THE CLOTH TO COME OUT DAMP. TIMING IN THE DRYER (AS WELL AS IN THE WASHING MACHINE) IS CRITICAL!


15. SET DRYER TO "LOW".

16. TOSS IN DRYER BALLS.

17. CLOSE DRYER DOOR - AND START.

SET A TIMER FOR 2 TO 3 MINUTES IN CASE THE DRYER RUNS OVER THAT TIME.

18. AFTER NO MORE THAN THREE MINUTES REMOVE WEAVING FROM DRYER - IT SHOULD STILL BE DAMP!

l9. LAY WEAVING OUT FLAT ON A TABLE OR DRYING RACK. STRAIGHTEN IT OUT SO THAT THERE ARE NO FOLDS - FRINGE IS EITHER LYING FLAT AND NOT UNDER CLOTH  OR HANGING OFF THE ENDS OF THE TABLE OR RACK.

20. LEAVE ON RACK OR TABLE UNTIL COMPLETELY DRY.

IF YOU ARE WET FINISHING COTTON MAKE SURE TO EITHER KNOT THE BOTTOM OF EVERY FRINGE BEFORE WET FINISHING OR TWIST FRINGE AND KNOT THE BOTTOMS OF THE TWISTS. COTTON TENDS TO UNRAVEL ON RAW ENDS WHEN WET FINISHING. (This is for both machine wet finishing or hand wet finishing.)

AFTER WET FINISHING CLIP ANY TAILS LEFT WHILE WEAVING.

That is it. So far there have been no problems. No wrinkles left in the cloth. No set in folds have occurred. With a fine enough mesh washing bag, no fringes have escaped and wrapped around the agitator.

Regardless - when I sell a weave, the tag says "HAND WASH COLD, LAY FLAT TO DRY".

Key things - delicate, wash no longer than 20 to 30 minutes (closer to 20 the better), dry only to damp - NO MORE THAN THREE MINUTES, lay flat to fully dry. Do you have to use softener or baby shampoo - no. Use whatever you want - I find these work. For a very soft yarn you may not want to sue any softener at all.

IF YOU HAVE NOT READ THE FIRST ARTICLE PLEASE DO SO.

Saturday, December 1, 2018

Yes, the Kromski Heddle Does Stay in the Up Position on the Loom

I often see comments about how someone's Kromski heddle on their Kromski loom will not stay in the up position on their loom. I have answered this many times and it is time I wrote an article about it.

The Kromski heddle and heddle blocks are designed to hold the loom solid in the up position IF the tension on the warp is fairly tight. Not break the beam tight but it is best described as drum tight. That is a term I have used when teaching miniature punchneedle embroidery which also needs to have the cloth in the hoop "drum tight". On the hoop it is easy to explain - tap on the top of the cloth in the hoop and it sounds like a little drum. With the loom, the warp is not going to make any sound if you tap on it, but if you push gently down on it about an inch down there should be resistance. Here is a photo with my fingers pushing down on the warp when the heddle is in the up position -


You see just three fingers lightly pushing down. On just the warp threads it pushes only slightly further (a photo did not show this well). Getting the tension here is not hard. Wind the warp to put some tension on it. Put the heddle heddle up. If it does not stay up by itself or it falls, increase the tension on the warp to the point that the heddle is solid on the top of the blocks. Like this -


See how the warp holds the heddle in place. And see that there are on need for rubber bands wrapped around the top of the heddle block and there is certainly no need for cutting into the notch on the top of the heddle block! Wow! Somethings that I have heard people do rather than get the heddle to stand as it was intended to.

Once it is staying up there, if you feel there is too much tension, then open a pawl (front or back) and move the ratchet one or two notches less. Put the pawl back on the ratchet to lock it and put the heddle back up - if it stays fine. If not, the tension has to go back to where it was - one notch at a time if you lowered it more than one notch.

One thing to know about putting the heddle in both the top and bottom positions is that you pivot the heddle into place. See how the bottom of the heddle frame sits in the notch in the photo above. Put it there first on an angle with the top of the heddle toward you and push the top of the frame up to put the loom straight on the block. It will move against the back of the notch and stay there.

For putting the heddle in the bottom position it is the same thing - with this same tension, put the TOP corner of the heddle frame on the top notch - both sides at the same time - always - and have the bottom of the heddle frame coming toward you. Have your thumbs push the top of the frame toward the back of the loom so that the bottom of the heddle swings into place to the bottom of the heddle block - and it will make a sound "SNAP" - you might even say "Pop" as in Pop Goes the Heddle. 😄 It makes a very definite connection - and stays there!  I love the sound the heddle makes when it snaps into place on the bottom position.

Here is the heddle in the bottom position -


So - it really does work. Don't crank up your tension to the point that it will do damage - but the tension has to be correct for the Kromski heddle to stay solidly in place - up or down! And each time you advance the warp you are releasing the tension to wind the cloth on the front beam and when done you need to return the tension to where it was.

When you finish weaving for the day - or will be away from the loom for several hours, take the tension off the warp - just enough for the warp and cloth to go slightly slack - not too much! This will reduce any stretch on the warp and also any stress on the loom while you are not weaving. 

Thursday, April 19, 2018

WET FINISHING

SINCE THIS ARTICLE WAS WRITTEN I HAVE WRITTEN A NEW ARTICLE ABOUT WET FINISHING BY MACHINE. PLEASE CONSIDER THE NEW ARTICLE AS A CONTINUATION OF THIS ARTICLE. - - - WET FINISHING BY MACHINE


I have been trying to put articles on this site in the order of start to finish when weaving, but wet finishing is a question that comes up from new weavers quite often, so, therefore, I am going to skip all the way to the end of the weaving process and share what I do to wet finish my weaving.

Wet finishing is the process of turning what is basically a woven net coming off the loom into cloth. One very wise weaver who is not identified - and maybe after I say that, this weave  will comment here "That was me!" (not "me") - that "IT IS NOT CLOTH UNTIL IT IS WET FINISHED". Wet finishing goes all the way back in the history of weaving which is a Very, Very long time. Essentially, wet finishing is getting the finished weave soaking wet. When the weaving is wet finished, the fibers and yarn relaxes. The weave comes together. Things in your weaving that looked not as good as you expected while it was on the loom sometimes correct themselves and look fine. The spaces that you saw between the warp and weft close up - depending on the weave. The size of the weaving changes - generally a  little smaller - even for fibers like acrylic that don't shrink. The cloth is said to "full". It becomes cloth.

Some say that acrylic is not effected at all by wet finishing and I have to disagree. I use a lot of acrylic yarns and there is a big difference for the better between the weave coming off the loom and the after it is wet finished. It does full. It does change size slightly. The yarn does relax. The weave does come together.

There are many methods to this. The current master of wet finishing is Laura Fry, who has written a book and has a video class available on her methods. This is just a preview of that class. I have watched several videos, collected a lot of forum and weaving group comments about how to wet finish and I have my own variation of what I have learned. I know that others have different methods.


One can wet finish by hand or use a washing machine. I have tried using the washing machine with various fiber weaves and I infrequently now use the washing machine and for just about everything - unless I get foolishly courageous and decide to "take one more chance" - I HAND WET FINISH.

I just started writing about experiences using the washer/dryer to wet finish and decided that I would not confuse the readers and just stick to a method that will work - wet finishing by hand.

This is what I do to wet finish. Again, others do it differently. This has worked for me.

1. Fill a plastic tub that fits in your sink with enough water to completely cover the weaving.

A dish washing basin works well - and comes in a large and small size. I found one in Walmart - they are not hard to find. To use hot, warm, or cold water depends on your fiber and what you want to happen with the yarn and the weave. Generally you go by the label that came with the yarn with its washing/care instructions. Natural fibers that shrink such as wool, cotton, and all the rest, if you use warm to hot water the fiber will shrink. Sometimes you want the fiber to shrink. If this weaving is going to be washed by the owner, and you do not shrink it, chances are that when it is washed later it will shrink. Most weaving calculators (like ours) take shrinkage into account when determining the warp and weft amounts and lengths. You may decide that you don't want it to shrink at this point and then use cold water. Some natural fibers, such as wool, felt. Think of felt that you buy for crafts and that is what your weave will look like after it is felted. If you use hot water and when the cloth is in the water you agitate it, the fibers will felt. Agitate it a lot and it felts a lot. Some projects call for felting as an effect in the finished project. How do you agitate the fibers? I have a joking comment to make but I will refrain. Move your hand around quickly through the water and move the weaving around a great deal with a lot of motion. This only happens with fibers that felt. For a man-made fiber like acrylic, you can use hot, warm, or cold water and it will not make any difference. I just use warm water for my comfort with my hands in the water when I use acrylic yarn.

2. I add a capful of baby shampoo to the water. If you put this in while the water is going in, it will mix itself.

Some use other soaps. Some use nothing. Some use special soaps made for yarns that is sold in knitting and weaving stores. When I started I used just regular clothes washing Tide. I then decided that if baby shampoo was good for baby's hair it has to be good for any fiber that I am going to wet finish. A big bottle of the non-name brand is just as good as the name brand, more expensive bottle.

3. If your weaving is not already in the basin, put your weaving in the basin. Obviously, if what you have woven will not fit in this basin or in the sink, get a larger basin and use that out of the sink. I have heard that some use the bathtub.

4. This is when the motion you want to use for the yarn you are using comes in - as I described in Number 1 above. Swirl the yarn around in the water. (If agitating - agitate now.) Just move the yarn around so that it all gets wet and all of it comes into contact with the soapy water. The yarn will absorb the water fairly quickly. I am not that concerned with washing the yarn. Some do say that the yarn should be washed. Other than a hand-spun, homemade yarn direct from the animal, I don't see the yarns I am using being that dirty that they need to be washed for a prolonged period of time. Longer does not hurt. I do this step for about FIVE minutes. If you are felting, the time will be longer to the point of felting you desire. If you are shrinking you would also increase the time.

5. Take the cloth into both hands and pick it up from the basin. Let it drip out either into the basin or the sink from your hands - just enough so that when you put it down on the side for a moment while you prep for the next step it does not flood the counter. I put down a towel to put it on. Put the cloth down.

6. Empty the basin into the sink. Turn on the faucet and rinse out the basin to get all of the soap out and when all you see is clean water and no suds in the basin, turn off the faucet. Put the basin back into the sink and fill it with clean water - no special temperature - cool is fine.

7. Put the cloth into the basin and swirl it around for its FIRST rinse. Again, not long. Just a few minutes is fine.

8. Repeat steps FIVE THROUGH SEVEN for the second rinse.
At this point the water should be clear and stay clear.

9. Repeat Step FIVE TO SIX, but now I add on partial cap of Downy Fabric Softener. Have it mix into the water and mix it a little by hand. PUT THE CLOTH INTO THE FABRIC SOFTENER WATER. Swirl it around to get the cloth submersed into the water mix. Set a timer for 20 to 30 minutes and go take a break.

10. During your break take two large bath towels or "bath sheets". I use white to not transfer any dye in the towel to the  weaving. Put the towels flat on a table - you want the towels to be longer than the total length of your weaving - so if it is a short weave then one towel may do it. If it is very long you may need a very long table and more than two towels. Tables are just so long so hang it off the ends of the length of the table - cover the floor for drips.

11. When you come back after the timer goes off, remove the cloth from the water. Allow it to drip in your hands. I gently squeeze to get the bulk of the water out but do not wring it out. Carry it over to the towels you set up in Number 10.

12. Lay the weaving on the towel FLAT. If the towel is wider than the weaving - and with a scarf it often is, place the woven cloth toward one edge and fold the other edge of the towel completely over the cloth. If there is not enough towel to fold fully over the weaving, then don't fold it. Start at one end and roll the cloth up into the towel, trying to avoid having any of the cloth wrinkle of fold on itself. Roll it up so that you are left with a long roll of weaving stuffed towel - like a cake roll. I then squeeze the towel gently to absorb some of the water inside. The towel is then set aside and you set a timer again for twenty to thirty minutes. DO NOT let the weaving stay in the towel for more than 30 minutes - when I have, it comes out wrinkled.

13. When it is time, take the towel roll over to a table that is empty. You are going to now unroll the towel and get the weaving out and lay it flat on the table. This is for the final dry. It often comes out of the towel just damp. I have not had it come out still soaking. Make sure the weaving is laying out nice and flat and leave it there until dry. You may wish to come back as the top seems to be dry and turn it over to expose the bottom to the air more.

14. I have come up with a way to make the drying time a little quicker and if not quicker there is no need to turn the weaving to expose the bottom to air. I went to a home store - Home Depot - and bought a six foot long and 16" wide plastic coated wire shelf used for closets. Also buy a package of the little plastic tips used on the sharp ends of the wire where the shelf was cut at the factory or the store to length. I place this up on two plastic "milk" crates. I found some small ones of these in Walmart during school supply season that were a dollar each and I have two spare if I need to get a second 16" wide wire shelf for weaving wider than 16". When I use only one shelf I stack two for each end just because I have them. Put the crates on the table. Put the wire shelf up on the crates - balance it so that it is sturdy. Lay the weaving on top of the shelf - let the fringe hang down below. You are now drying both sides at once.


15. How long does it take to dry? This depends on the air it is drying in. In the winter with the heat on and the air being drier, it can be totally dry in four or five hours. In the summer with the humidity it can take over night to into the next day to be totally dry.

IMPORTANT NOTES -

FRINGE

There is always a question about finishing your fringe before or after wet finishing. I have done both. Many say always finish the fringe before you wet finish. I know that I am gentle with the fringe and the cloth as I wet finish by HAND - and make sure the fringe does not get tangled - which it wants to do.  Some yarns will un-ply at unfinished ends during wet finishing. Cotton is one that will often do this. Finish your cotton fringe always before wet finishing or at the very least tie a knot in the bottom of every fringe if you plan to just have plain fringe or will take care of fringe finishing later. If in doubt, finish the fringe before you wet finish.

FIXING UNINTENDED FLOATS

Examine your weaving before wet finishing for any mistakes made - floats - warp or weft threads not caught into the weave and stick up across the weaving where it should have been woven in. I am not going to explain the process to fix these now but FIX ALL FLOATS BEFORE WET FINISHING.

CUTTING WEFT TAILS

As you changed colors of weft or ended one shuttle or bobbin and started the next, you left weft tails hanging down from the weave. DO NOT CUT THESE OFF UNTIL AFTER YOU HAVE WET FINISHED THE CLOTH.   Once the cloth is completely dry cut those off close to the cloth but always making sure you don't cut the weaving at the surface.

ASSEMBLING 

If you are joining two pieces of weaving together, do that before wet finishing.

HEMMING TO NOT HAVE FRINGE

If you are going to cut off the fringe and hem your cloth so there is no fringe on an end, DO THAT BEFORE WET FINISHING. There is a specific method to do this - I am not including that at this time in this article.

I HAVE HEARD...

Have you heard about putting your weaving on the floor of the shower and turning on the water and walking all over it? Like I said early on, there are all different ways that people wet finish. (If not everything else , do take off your shoes before doing this.) 😃 


+++++++++++

Don't be put off by all of the steps. It does not take that long to wet finish your weaving. There is more "wait" time than there is active time doing it.


PART TWO - WET FINISHING BY MACHINE


Wednesday, March 21, 2018

Some Rigid Heddle Books Reviewed

One of the best way to teach yourself to weave on a rigid heddle loom - in addition to watching videos on YouTube and other sites - is to have a good book to start with. Choosing that book is important - I know because I chose the wrong one when I got my rigid heddle loom and became so frustrated trying to figure out the details of getting started, that I almost gave up - until another book was recommended to me - which got me going in a day. There are a handful of books specifically about the rigid heddle loom. Here are the ones in my personal weaving library that I will share my impressions about with you.

The first book - and the book that saved me from taking the new loom right back that first week - is Inventive Weaving on a Little Loom by Syne Mitchell. This published by Interweave - and most of the rigid heddle books are.  This book is the absolute best book for anyone who is going to learn to weave on a rigid heddle loom who has never woven before. This book covers all of the basics in detail with clear full color photos and diagrams and clear descriptions of what to do. The first 109 pages of this large book will teach you just about everything you need to know. Then from page 111 to the last page of 285 before the index pages start, the book goes beyond the basics and takes you into advanced weaves and weaving patterns,  the use of colors, and much more - all the way to weaving on a rigid heddle loom with double and even triple heddle (not all RH looms are capable of three heddles). Interspersed in these pages are project patterns to weave that give you what yarn to use, how to warp the pattern, and what to do to weave it. All illustrated clearly.  I have been weaving for three years now, and I still go back to this book to check on something I am not sure about and to learn something new for a technique that I have not tried yet. When there is a problem, this is my go to book.  Many rigid heddle weavers feel the same way about this book. I only wish that someone had told me to buy this book first when I was starting.

After you have gotten down the basics, the next very good book is The Weaver's Idea Book by Jane Patrick. This is NOT a book for a beginner. This book mirrors some of the techniques in the advanced part of Inventive Weaving on a Little Loom, but goes into more detail and covers techniques that are not covered in Inventive Weaving... With this book you are going to learn to use your pick up sticks and start doing pattern weaves with fairly good detailed written instructions - and photo illustrations. The only draw back I find with this book is that some of the photo illustrations are not clear enough to see what you are trying to achieve - and her use of color yarns in some illustration photos is poor when it comes to defining the look of the pattern. This is a good book, even though I will search other illustrations of what is being shown in this book to be sure I understand what I am looking for when I do it on my loom. This is a hardcover book with an inner spiral wire binding so that the book lays flat and the pages open to put on a table next to you as you follow the directions. Despite some illustration photos - not all - she give very clear step by step numbered directions. #1 Do this. #2 Next do this. And it goes on like that until it says REPEAT. Once you know what you are doing with the basics and once you are very comfortable with your loom and are ready to move ahead, this is also a must have book. BUT there are no basic rigid heddle instructions in this book. It starts advanced and keeps going.  There are also no project patterns to weave in this book with the exception of some sampler projects that use all of the various weaves from that section in the book - but you are not coming away with a scarf or usable item. This book is also published by Interweave.

The next book that I will share with you is a book titled, Weaving Made Easy by Liz Gipson. This is a slim paperback book that contains some basic weaving instruction and then 17 projects to make on your rigid heddle loom which include household items like towels, cushion covers, placemats,bags, things to wear (even slippers), a rug, belts, etc. This book has some detail on how to weave from the beginning on a rigid heddle loom but does not go into the detail that Inventive Weaving... does.  I would not get this book instead of Inventive Weaving..., but it is a good book to get for the different types of projects (if you learn to make towels from the pattern in this book you can then make any towels you would like to make - and that goes for bags, etc.) and it is especially a good book because it goes into detail - on just a few pages on something not covered in any of the other books I have or have seen. That is to fix warp and weft floats discovered after your weaving comes off the loom. These result when your shuttle goes under or over the warp when it should have gone through. This book tells you and shows you with good color photos what to do to fix these. Frankly, that was what led me to buy this book and I have since found it good for the project patterns in the book. Again this book is published by Interweave.

The next book is the one I bought and received just before my rigid heddle loom. The title of the book is Hands On Rigid Heddle Weaving by Betty Linn Davenport. I was told it was good for a beginner. It wasn't. IF you are not a beginner it is an OK book as it does contain a lot of nice project patterns and goes into how to make those patterns. Here is the problem with this book. The illustrations on what to do are not photographs but roughly drawn pen and ink drawings.  Basically sketches that to a total beginner are not clear to follow at all. Some of this book reads like it was intended for a college course on rigid heddle weaving and there is nothing wrong with that - as long as one has a teacher to guide you through it, but not for an on your own, total beginner. I kept this book. I bought from a retailer to which I could have returned it for a full refund, but I didn't. There are things in this book that if you can figure them out - and also project patterns - that are very good. I do not find myself picking this book up to look in often. If the illustrations would have been better and full color large photos, with do this, then this in detail, it might have been much better This too is published by Interweave. 

The last book in my collection - for the moment - is titled Simple Woven Garments by Sara Goldenburg and Jane Patrick - the same Jane Patrick from The Weaver's Idea Book. This is a book on how to weave clothing accessories with cloth you weave on your rigid heddle loom. The book has over 20 projects including jackets, shawls, tops, etc. I bought this book for the first 21 pages because in those pages are how to weave the cloth needed for making clothing, etc, how to cut the cloth you have woven, how to deal with the edges once cut, and how to sew the cloth to make clothing and other woven items that are assembled. It is only a small section of this book but it tells you what you need to know. The next really nice thing about this book is if you don't want to make what is exactly shown in one of its projects there are techniques described and illustrated that could apply to similar things in other types of projects. I had been looking at this book at full price on the shelf of a Barnes and Nobles bookstore and was interested. I lucked on a copy of this book in a closeout store and then could not resist the price for what can be a very valuable book to have if you intend to cut the cloth you weave and assemble it into something to wear or use. And if you don't find the patterns for things that are your taste - there is enough here to turn it into something that is something you would like. This book also is published by Interweave.

So there you have my rigid heddle weaving book collection. There are many more books for rigid heddle weaving and if you go to the Interweave website and look through the books specifically for rigid heddle looms (and do make sure the book is for an rh loom and not another type - as not all techniques apply from one type of loom to another) you will find a few other books that may be interesting to you. Also don't forget to check local libraries as many of these books are available in them.


Friday, February 9, 2018

FIRST WEAVE A HEADER

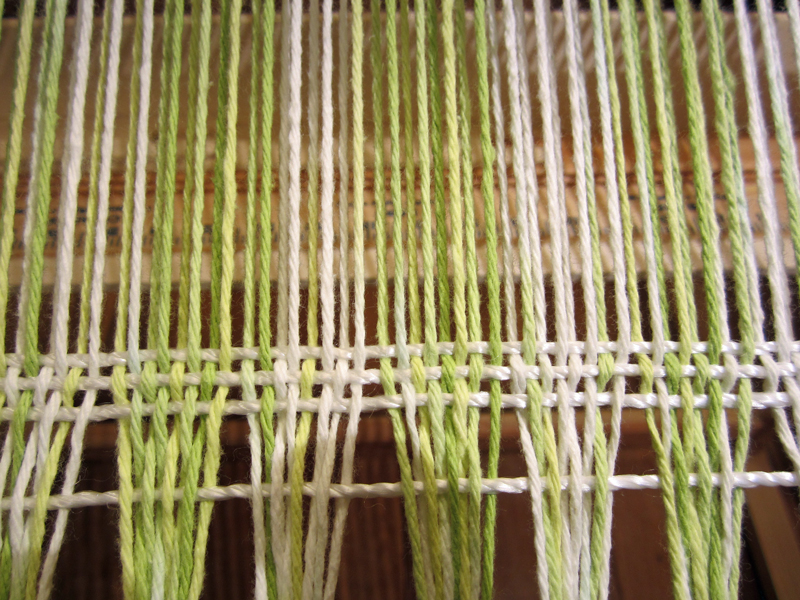
After you have tied your warp onto the front cloth beam and are ready to weave, before you start weaving with your project yarn, you need to do something about those triangular bundles of tied on warp that is pulling your warp to follow those triangles. To fix this, before you start weaving with your project weft yarn you need to weave a header. The header will straighten all of the warp from your heddle to your apron rod with the bundles tied on. Weaving a header is simple.

You will need something that is NOT your project yarn to do this. Any scrap yarn can be used. It is best that it is thicker than your warp yarn. Some have even used rolled toilet paper to weave a header. The header is going to be removed when your weaving COMES OFF THE LOOM so you want to use something that is going to be easy to get out. I use something called Mason Twine. This is a polycord that is used in construction to lay out brickwork or pavement. It is inexpensive. It can be found at home stores like Home Depot or Lowes. Any hardware store should sell this. Walmart sells this in the aisle near hardware that has rope. You get a lot on a roll.  It looks like this on the spool -


This is cord is slick. It slides easily and when it is time to pull it out, it just slides right out.  When you cut this cord it is best to seal the end so that it does not unravel. Just put the end of the cord near a flame for two seconds and it will start to melt. That's it. 

To measure how ,much you will need unwind the cord from the roll over your warp. Go across your warp eight times plus an extra inch or so each time to have enough cord. You now have enough cord to weave your header.

You are going to start about two or three inches above where your knots are on the warp beam. Adjust the tension on your warp to weave - same as if you were about to start weaving with your project yarn. 

With the mason twine I find it does not stay on a stick shuttle very easily, so I use the stick shuttle to push the yarn through the open shed using the slot of the shuttle to hold the yarn as it goes through. 

1. Open the shed. Take an end (doesn't matter which) of the header yarn or mason twine and push the end through the open shed to the other side with the end of a shuttle. Grab hold of the end as it comes through and pull it through. You want almost the entire length to come through the open shed. Leave a tail with the opposite end hanging out from the side you started on. Straighten the cord or yarn across inside the shed. Close the shed to neutral. DO NOT BEAT.

2. You are now on the other side of the warp with the long cord. Do as you did in STEP 1 going back the other way. Open the shed, push the end through getting most of the yarn out the other side. This time DO NOT pull the cord/yarn that goes over your warp end  to the other side so that it tightens against the end warp thread. Instead leave a loop hanging out. DO NOT BEAT.

3. Repeat STEP 2 twice more but with the fourth row of this header yarn. Here is what this will look like at this point - 


4. NOW you are going to BEAT all four rows at the same time.  If the first row does not move, don't worry about it. Make sure the other three rows get up against each other and MAKE SURE YOU HAVE A STRAIGHT LINE OF CORD/YARN ACROSS THE WARP.  You see below what this looks like now - and you can see that the warp yarns above this start of the header are coming to straight with even spacing. But not completely - yet!


5. Now you should be on the same side you started on when you started your header. You are now going to start weaving with the header cord or yarn normally. 


I still leave a loop on the ends. I do not want the warp to be pulled in on the ends. I weave about four rows. Above you see the next row being put in - at an angle as you would do when you weave.

6. Keep weaving with your header cord/yarn until you see all of the warp nice and straight above the header to the heddle. I like to come back to the side I like to start to weave at. For me, I like to start on the right side of the warp with the heddle in the up position. If you start differently get your header yarn/cord to stop at the side you like to start weaving. If this means you have a lot of header cord/yarn left over, you can just leave it and it will wind up with the cloth or you can snip it off. Be very careful with scissors around your loom. You DON'T want to cut any warp threads. 


When you look above you see nice straight warp and even spacing. You are now ready to weave with your project yarn!

No matter what pattern you will be using for your weaving, start with a header first - no pattern - just plain weave.  If you don't weave a header you are going to find that your angled warp is going to make your beginning weave very uneven. 

When I start weaving after I weave my header, I move up a couple of inches from the header before I start weaving with my project weft. I do this to leave a space between the weft and the header so that when I hemstitch the end of the yarn on the loom (hemstitching article coming) the wrap will pull together in the hemstitch and allow for a nice tight stitch.


Some have other ways do create a header. Some use sticks that are woven into the warp. This can also work. For an rigid heddle loom, I have found that weaving a header as in this article is easy - and works every time.


Monday, November 6, 2017

DIY Bobbin Winder for Boat Shuttle Bobbins for Under $2 or Less!

A boat shuttle can be a fun accessory for a rigid heddle loom. They are used instead of the usual stick shuttle that comes with rigid heddle looms. With a rigid heddle loom they do have some drawbacks as they can only hold as much yarn as will fit on a bobbin and with the usual knitting yarns used by many to weave as weft on their rigid heddle looms they do not hold very much of that yarn and that means ending and starting a new bobbin frequently as you weave along with the many end and start ends you will have when your weaving comes off the loom. They are great, however, with thin yarns and you can get a good amount of finer yarns on a bobbin that will keep you weaving.

I am not going to go into buying a boat shuttle. One thing that you need to know before buying a boat shuttle is how large top to bottom is your open shed in either the up or down position of the heddle. The boat shuttle must fit through this opening with room to spare so that it will go from one side of the loom to the other as you weave. So before buying a boat shuttle measure the open shed and buy a boat shuttle that will easily fit and not be tight against the top and bottom of the shed as it passes through. There are several boat shuttles that will fit and one of the companies even makes a boat shuttle that they call "slim" that should fit a rigid heddle loom.

But once you have your boat shuttle you need to wind the weft yarn onto the shuttle's bobbin. This can be done by hand but while some do it, it is not practical. You would rather spend the time weaving. You want to wind the bobbin fast. There are manually cranked and electric motor winders sold - and they are expensive. But most have around the house a common tool that is perfect for winding a boat shuttle bobbin - an electric variable speed drill. Good for all kinds of projects around the house. And it is good for winding bobbins - but you need a secure way to get the bobbin onto the drill.

Here is a bobbin carrier that will cost you less than $2 at any home or hardware store. You will need:

1 six inch dome head screw bolt 1/4" in diameter
1 nut to fit bolt
1 small washer to fit bolt
2 larger washers to fit bolt


The bobbin for my boat shuttle is four inches long. The screw bolt is six inches long. This allows two inches to be tightened securely into the drill chuck. Boat shuttle bobbins can be different lengths. If your shuttle uses longer than a four inch long bobbin you would just need to get a screw bolt two inches longer than the bobbin length.  Also check the hole diameter in your bobbin. If it is wider than 1/4" then get a bolt that will just fit in - don't get a bolt that is much smaller than the hole in the bobbin. If you do, it will not wind evenly as it turns on the drill.

Here is how this will go together -


The small washer goes on first. This is to give a flat base to sit against the top of the screw. One of the large washer's goes on next. Then the bobbin is slid on. Next goes the second large washer goes on, Then put the nut on the bottom of the screw and tighten the nut against the washer to hold the bobbin securely on the bolt. Do not over tighten. Do not use any tool. Just turn the nut on with your fingers.

Put the end of the screw (not the dome end into the drill chuck and tighten the chuck. A variable speed drill will turn faster or slower by how much you hold the trigger in. You are going to start winding your yarn onto the bobbin SLOWLY.  First - with no yarn pull the trigger of the drill and see where you want to hold the trigger in to get a slow and steady wind. Also take note of the direction the drill is going. Most of these drills are also reversible so if you want it to turn the other way there will be a switch to do that. Take the end of your yarn and wrap it around catching the end under one of the hand wraps you do here at the top of the bobbin and make sure you are wrapping the same way the drill will turn. Now pull the trigger just a little and get the bobbin turning and you will have your yarn now winding on the bobbin.


 As it is winding hold your yarn with one hand while you hold and work the drill with the other. Move the yarn from top to bottom and back again along the bobbin as the drill turns and wind the yarn evenly along the bobbin. Once you have the wind going evenly you can squeeze the drill trigger harder and increase the speed - but don't get carried away! Once the yarn comes toward the top of the ends of the bobbin stop. Your bobbin is wound!


 This yarn is a #3 crochet cotton/wool blend. The thickest yarn I will use with the boat shuttle is a #1 knitting weight sock yarn. Anything thicker and I will go back to using a stick shuttle.


Cut the yarn between the screw and the ball. Take the screw out of the drill - just reverse how you turned the chuck to tighten it so that now you loosen it. Take the nut off the bolt, slide down the lower washer and slide off the bobbin. You are now ready to weave!

It is a good idea to buy a number of bobbins. They are often sold by the dozen. You can then wind all your needed bobbins for your project right at the start and have them ready to slide onto the shuttle when one ends.


It is easy. It works better than trying to chuck a pencil into a drill to hold a bobbin. (I tried that and was not happy with it.) And the price is right!

Monday, August 28, 2017

A Dowel Replacement on A Kromski Loom

Over time the tension on the warp may bend your dowel rods on your Kromski loom. This is not a big problem to deal with. Dowels are available in every home store and in some craft stores. There is nothing special about the dowels Kromski uses on their looms. They are hardwood dowels. You can use a bent apron rod BUT it is best to keep the distance from the rod to the heddle at an equal distance across. When I noticed the bend on one of my Kromski apron rod dowels after using it a few months, I went out to buy dowels to replace the bent dowel. I bought a same sized dowel - you will need to cut it to length - even a small hand saw can do this - and I decided to buy an OAK dowel. Oak dowels are slightly more expensive but worth having a harder wood.

Home stores should sell perfectly straight dowels - as they should sell perfectly straight lumber but that does not always happen. Take some time to find the straightest dowel the store has. Take it to a flat surface in the store - heavy oak plywood is often flat - and roll the dowel on the flat surface and see that that it rolls flat and does not bump up at any point along its length. It pays to take time to get a good straight dowel.

I thought that this was going to be final solution, but wood is wood and in humid areas and with tension being put on the dowels on the loom, even the best round dowel will eventually warp or bend. I looked at the apron rods that Ashford uses - they are not dowels. They are flat strips of wood. If used with the flat side UP - meaning the edge of the flat wood strip faces the heddle and not the larger flat surface of the wood. I went out and bought a 1/4" thick board in one of the Home Stores. These thin boards are considered "hobby" boards or wood. I cut a strip off of that board as wide as the dowel on my Kromski and I attached it with the existing TexSolv apron cords that I had put on (see the last article). It is very hard to bend a strip of wood along its edge.

I only replaced on dowel with this flat apron rod. The cloth beam apron rod Oak dowel that I replaced the Kromski dowel with has been fine so far. If it ever needs replacement, I have more of the flat board to make a flat apron rod for this side.


It works! It will require someone with a table saw to cut the strip of wood to the correct width and then the length needs to be cut the same length as the Kromski dowel.


Monday, August 14, 2017

Different Apron Cords on a Kromski Loom

Kromski several years back changed the apron cords on their looms. At one time you received a long strand of nylon cord and the Kromski instructions told you to cut the cord into equal lengths and form looms with the cord which required holding the cord ends together in a candle and hoping to get them to melt - which meant needing to do this for all cords to come out to equal length loops which is not always easy. Then they decided to change how to use this long length of cord and put a screw at each end of the warp and cloth beams and tied the cord between the screws and showed in their new instructions how to wrap the cord around the apron rods to form "V"s to hold the apron rod loosely in place.


This works if you are using their "warp helper" block to warp your loom but did not work well when I tried to use this when direct warping. The problem on a 32" wide loom was emphasized when the dowel rod would dip down on one end while warping the other end and across. Some love this new setup and if it works for you don't change it. But I struggled with this for several months and then went out looking for an alternative.

I could have cut the cords into pieces and used the old instructions which are still easy to find on the internet to cut and burn the loops together and use them as they used to be uses. But I really did not like that. I looked to see what other looms do. One other company uses a plastic band to hold the rod to the beam. Another uses something called TexSolv - a product commonly used in multi-shaft weaving. The feature of TexSolv is that it is nylon cord made up of a chain of small loops that make it easy to put an end through one of those loops, pull and have the length of the cord on the loom exact as long as you you put the cord end through the same loop counting up.

I decided that the TexSolv was a great way to put the apron rods onto the beams and I went out to find it. If there is no weaving store near you, several of the weaving websites sell TexSolv. Some have better prices than others. Be aware that this cord is EXPENSIVE. You can buy it by the foot and you can buy it on a spool. I decided - not being sure how much I would need and not sure if at some point I would want to replace the TexSolv cords with new ones - to buy a spool.

Schacht has an excellent video on how to put TexSolv cord on the apron rods and beams of their Rigid Heddle looms and this process is the same for the Kromski. Here is a link to how it is done -

https://www.youtube.com/watch?v=DPGVyv3z8T8

Here is how it looks on my loom. Compare this photo to the one above. The apron rod is securely tied to the beam. You will see the two end cords not around the dowel - this is to keep tension off the ends of the dowel when weaving less than the full width of the loom. All I need to do is slip those back over the ends of the dowel.The best thing is that it is so easy to get equal lengths cord that enable your apron rod that you warp and tie onto the same distance from your heddle across the entire length of the apron rod.


Here are some close ups and you can easily see how this cord is constructed with small loops.


A small investment made using the apron rods so much easier. And you can easily slip cords off the dowels for narrow projects to put even tension on the dowels.

Monday, May 15, 2017

A Simple Tip When Warping a Rigid Heddle Loom

My Kromski loom came with something that Kromski calls a "Warp Helper". It is a block of wood with a rectangular slot in the bottom and a hole through the top - for the apron dowel to slide through to hold the dowel while you warp. On my 32" loom the dowel both pulls this block off the edge of the loom that you are supposed to push it down on and the length of the dowel cannot be supported by a single block like this. I tried to make my own similar blocks and none really were very satisfactory. The idea is that the warp dowel needs to be held while the warp is being tied on to it. I have since watched Kromski's video on using this and saw that if one were warping on a warping board and then transfering the yarn to the loom to tie onto the warp beam, the Kromski warp helper will work, but when direct warping - which is so common with a rigid heddle loom - the block does not work well.

So what to do to hold the warp dowel when warping - and then again hold the cloth side dowel when tying on the warp on that side? The answer just came to me one day and it is SO simple that it is just silly that this is not shown all of the time!

I used rubber bands. Not special rubber bands but thick and strong rubber bands. These are the type of rubber bands that the post office uses. And they can be found where stationary is sold - Walmart, Staples, or other office stores or stationary sections in a bag of many for just a few dollars. You will get more rubber bands in that bag than you will ever need. Here in photos I can show you much easier what I am talking about.

You have your apron rod or dowel that you are going to tie your first warp thread on, and take a loop from that thread through your heddle slot to your warping peg and back again - but the dowel is just hanging there. Wouldn't it be easier if it was up and supported in front of you - straight across the back of the loom?  Take a look here -


Here you can see the apron rod for the warp - in the back of the loom. You are looking from the front to the back. See how the rod (what the warp loops around) is sticking straight across - with its cords stretched out behind it connected to the warp beam. Now look to the left of the photo from the end of the heddle back. Wait - here is a close up of that -


See the rubber band? So simple. There is a rubber band on each side of the loom. One end of one rubber band goes around the top of the heddle block and the other end goes around the end of the apron rod (or dowel). Do this on each side. Put the rubber band on, and crank back your apron rod to put some tension on the rubber band. Position the rod where it is comfortable for you to tie and wrap onto it as you warp. Can you believe how simple this is.

Now, once you have all of your warp on the warp apron rod, take the rubber bands off BEFORE you start winding your warp on the warp beam. This is easy to forget - but you will not be happy if you leave those two rubber bands in place. BUT just put them aside, you still need them!


The warp is all set on the warp beam. You have taken one warp out of each slot and put it in the adjacent hole. You are now ready to tie it on the front beam. And you are going to use your rubber bands again. You will do the exact same thing but now on the front dowel.

Take a look -  


It is hard to see but there is a rubber band on both the left and the right sides. Here is a close up of the right side.


With the dowel straight across and being held in place with the rubber bands, start tying your warp on the front beam. Here are close ups of the rubber bands going around the top of the heddle block and dowel end.


Once you start tying your warp bundles on to the dowel and you have enough evenly on both sides of the dowel to support the rod with the warp, you can take the rubber bands off. I have left them on until the end, but I have been finding that they might interfere with getting a good tension before you make your final adjustments of each bundle to get even tension on each. No matter what - you must take these rubber bands OFF BEFORE you start to make your adjustments of tension on each bundle. If you don't you will not have correct tension on your warp to weave with.

You can certainly use each rubber band many times but if you use two that have stretched out unevenly, you will put your dowel at an angle. Just take a look at how far each end of the dowel is from the heddle - the two measurements should be equal. A simple ruler put from the heddle to the dowel on each end will tell you immediately if you need to put these rubber bands aside and take two new ones. Those rubber bands are still good - for the usual uses for rubber bands.

This will work on any Rigid Heddle Loom - as long as there is part of the heddle block sticking up to put the rubber band around.

So you see, two simple rubber bands can make a job that potentially can be frustrating simple and easy!