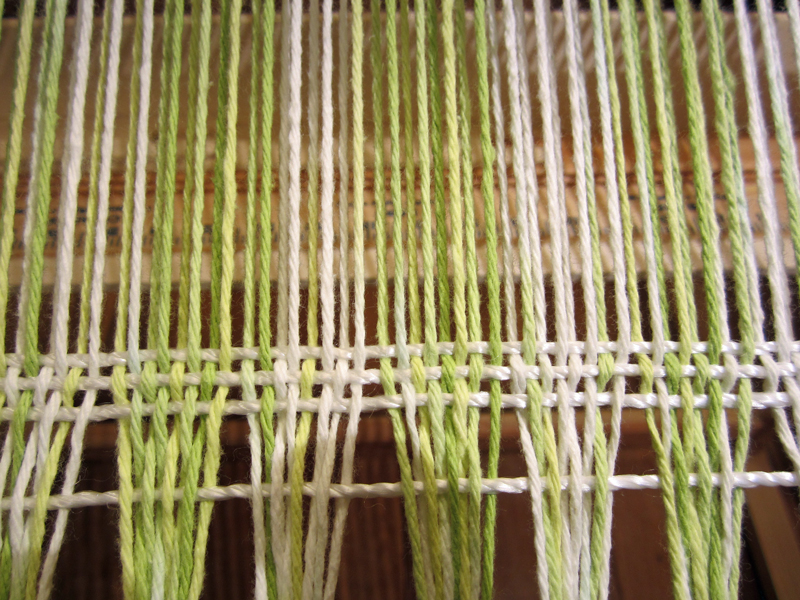
There are some things that should be more clearly stated about direct warping that go beyond the back process and often are left out all together. One of the first things to understand is that when direct warping - whether you are using a single vertical peg, or a horizontal rod as I have described in the article on this site, "Another Way to Direct Warp", multiple pegs, or hybrid warping using a warping board to direct warp - is that all you are doing when you bring the yarn from the loom to the warping peg (etc.) is measuring the yarn to weave the length you want your weave to be on the loom. That length of warp on the loom is not the length of warp you want your final off the loom length to be. It is longer to account for shrinkage, waste, fringe, tie on, etc. This length is calculated as part of your project calculations with a weaving calculator. To get that length that the calculator gives you for your warp you need to measure the distance from the warping peg to the position of the apron rod in the back of your loom at which you will warp to. With a single peg - measure from the center of your loom - to the peg.
When you warp to a single peg your warp is creating a V shape with the point of the V at the peg and the top of the V at each end of the warp on your heddle. Geometry tells us that the distance from the point of the V to the center point between the two legs of the V at the top of the V is shorter than the the length of each arm of the V. (This can be confusing at first - so take a moment to read that last sentence again and let it sink in.) What does this mean? It means that the warp at the center of the loom is shorter than the warp at the ends - and this distance right and left of the center of your heddle gets longer. You want all of the warp yarn to be AT LEAST the length of the center of the heddle to the peg. This means you will have longer warp on the sides - but that is necessary when warping with a single peg - or your warp will be too short for your project. Are you wasting some yarn? Yes. Is there a way around that? Not if you warp to a single peg. With a horizontal rod to warp to you should have equal lengths of warp from heddle to rod. With a warping board for hybrid warp, you will still have the V. With multiple pegs, you will have less of a V though you will create multiple Vs warping to multiple pegs and yarn length will still vary but not as much..
When new weavers direct warp - and some experienced weavers as well who have not figured out this next thing - they often find the warp peg come flying off the table it is attached to and the peg and the yarn come at them at the loom resulting in warp tangled on the floor. Sometimes the warp can be salvaged and sometimes it can't. This happens to many - it happened to me on my second project ever and it happened twice during that warp. The first time I could salvage the yarn. The second time I could not. Why does this happen? There is too much tension on the warp between the loom and the peg.
There is no need to have tension on the warp when you are warping to the peg! As we just established above you are measuring the yarn when you warp to the peg. If there is tension on the warp, the warp acts like a spring - if you pull a spring too much it wants to spring back! The peg will only take so much before the warp wants to pull it in the direction from which it is being pulled - and it is going to go flying. To prevent this there are two things you can do - one is to clamp the peg on the far side of the table and never the side closest to the loom. Closest to the loom if the peg is pulled it has nowhere to go but at you. On the other side of the table when it is pulled it will first pull itself into the edge of the table it is clamped to. But sometimes even that will not stop it and it still comes flying off with the warp. Or the pulling causes the warp to travel up the peg and come off the top.
One other thing that happens when there is too much tension on the warp from the loom to the peg is that you are stretching the yarn. Again, think of the yarn as a spring. As it is pulled it gets longer - much longer than the spring is when it is not being stretched from pulling. And since you are measuring the yarn to the peg, what is happening with the yarn under tension is that when you take the warp off the peg to wind it on the back beam as soon as it is off the top of the peg, the warp yarn RELAXES! And it gets SHORTER! Oops! What you thought was 90" long was stretched to 90" long and it really is 85 inches long or shorter! Your warp is too short for the length of the project you intended to weave, and you won't know it until you get near the end of your warp on the loom while weaving and you are no where near the length you thought you would have.
There is no reason for the tension. It is OK for your warp to sag from the loom to the peg AS LONG AS it sags consistently from one end of the heddle to the other. This is not a problem. It may be a little longer than you need BUT LONGER IS BETTER THAN SHORTER when it comes to warp!
But the books say to wind the warp onto the back beam under tension! Yes, it does but you have not been winding on yet - you are just measuring your yarn from the loom to the peg while you warp. When you have warped all of the slots and take the warp off the peg to wind it onto the back beam THAT IS WHEN YOU PUT THE WARP UNDER TENSION.
When you are more experienced these things start to click and make sense. It really is simple but you don't usually see this in a book or even in the videos showing direct warp to a rigid heddle loom.
What else can go wrong? Lets go back a little - before you have warped the loom but are about to start. Look at your loom. The heddle is generally located not at the center of the loom but more toward the back of the loom frame. The space from the heddle to the back of the loom is shorter than the heddle to the front of the loom. SHORT END IS THE BACK OF THE LOOM. LONG END IS THE FRONT OF THE LOOM. THE BACK OF THE LOOM IS THE WARP END. THE FRONT OF THE LOOM IS THE WEAVING AND FINISHED CLOTH END. Before you warp make sure your loom is facing the correct way. AND when direct warping you put the FRONT of the loom toward the warp peg. You bring the warp from the ball of yarn around the back APRON ROD (the apron rod is the dowel or flat "stick" that you attach the warp to) through the slot in the heddle and over to the direct peg - put ir over the peg and come back to do this again for the width of your warp in the heddle. So now you know what is the back of the loom and what is the front of the loom. You do not want to weave from the back of the loom - the space between the heddle and the beam is just too short. Weaving is done on the front of the loom - the long part of the loom.
ALWAYS WARP SO THAT THE YARN IS CENTERED ON THE HEDDLE. (When you get a new heddle the first thing you should do is take a marking pen and make a mark on the heddle frame at the center of the heddle - either that will correspond to a slot or a hole.) Do not warp with the yarn on one side of the heddle and the rest of the heddle is empty. As you weave you are weaving with the warp under strong tension between the beams. If you are not centered you are pulling he beams on the side the warp is on and the empty side is going to try to flex - which can break the beam. When planning out where your warp will go on the heddle - with the heddle off the loom and in front of you on a table, start at the middle slot and count out to the right and then to the left to find the starting warp slot and the ending warp slot with the center slot in the middle. This means when you count to one side, count the center slot BUT when you count then to the other side do not count the center slot it is already counted - start in that direction with the slot next to the center slot. A simple tip is to take a piece of yarn and tie it around the top of the frame of the loom through the starting slot and another through the ending slot. On the loom when warping start at one marked slot and stop at the other marked slot. If you often use the same widths to weave on that heddle - keep the marking yarns tied on - use a different color pair of yarns for different weaving widths and make a note of which is which width. (Sounds like it is part of a song in the Wizard of Oz! 😀 ) And before I start singing - we will move on. 😉
Also before you start weaving, you may notice that the heddle (on some looms) is different on one side from the other side. On some rigid heddle looms the heddle is bumped out on one side. On other rigid heddle looms the heddle is flat on both sides. So which is the front of the heddle and which is the back? With a heddle that is flat on both sides it does not matter. But guess what? On a heddle with the bump out on one side and flat on the other it also does not matter. Kromski looms and Ashford looms have heddles made with the bump out on one side of the plastic of the heddle - it is in the area of the hole. One thing that this does is strengthen the plastic around the hole. Yarn passing through the hole constantly is not going to wear through that thicker plastic that forms the bump. But is there a front and back and a right side and a wrong side to use to beat with? Not really. Some will say the name of the company that made the heddle is on the front of the heddle. Hmm? Kromski puts the name on the heddle on the same side as the bump out. Ashford puts the name of the heddle on the flat side of the heddle. Which one is right? It is really a matter of personal preference. My own preference is to beat with the heddle with the bump out. I find that it pushes the weft row more directly than the flat side BUT am I right? Some like using the flat side. Are they wrong? Some looms only have a heddle that is flat on both sides. Is that a problem? NO! There are as many using the bumped out side to beat with as there are those using the flat side when their heddles have two different sides. (An interesting side note - Kromski's 10 dent heddle is flat on both sides. When I asked them about this they had no answer as to why the 10 dent is flat and the 5, 8, and 12 dent heddles are bumped out on one side.) So decide for yourself if you have a bumped out heddle on one side. Try a project one way and another project the other way - and see which you prefer or conclude that there is no preference.
OK - here is something that comes up in discussions often. You will see in books and in videos on direct warping that it is said that when you put the yarn around the apron rod to put it in the slot you MUST alternate the yarn going over and under the apron rod - first over, then under. When I first started weaving I was making myself crazy making sure that I got this right - checking with each warp slot that I passed the loop of yarn through. GUESS WHAT? The yarn goes this way whether you think about it or not. It can only go this way - over and under alternating - it does it itself. If it is not, you did something wrong in bringing the yarn from the ball to go around the apron rod and through the slot. It really cannot go any other way if you are warping correctly.
When you wind the warp onto the back beam, you are winding the apron rod on with the warp tied on to it and with the warp UNDER TENSION (how you put the tension on is another article in itself), you must put a warp separator under every layer of warp that you wind on. Warp separator can be as simple as sheets of brown package wrapping paper. A warp separator must be thick and it must not compress so that the one layer of warp sinks into the war layer below. Thin paper - even thin cloth is not a good warp separator as it will push in with each warp under tension and push into the row below and maybe even rip the paper. The purpose of the separator is to keep each layer of warp apart and not mixing into the layer below. Some use flat strips of wood put in between the warp as it is wound on. Some use the rubber no slip shelf liner - the one with the bumps on the surface of rubber. Many use the package wrapping paper which is sold in office stores or even Walmart in the stationary aisle. That paper lasts for a long time and many weaves.
There is such a thing as double warp. I am not going to go into how that is done but know that it is two warp threads in each slot and each hole. The yarn that this is done with MUST be thin enough to fit doubled in a slot and in a hole. Don't force it in - it will just rub and break as you are weaving. A beginning weaver should not be doing double warp until they have a lot of experience with single regular warp.
What can go wrong while warping?
If you find that there is not enough warp yarn on the ball after you have been warping and then passing the loop through the slot in the heddle does not make it to the peg, stop and bring that loop back to the loom. Pass it back through to the back of the heddle and tie it onto the apron rod. Get another ball of warp yarn and tie the end on the apron rod and keep warping, Make sure you are starting in the now empty slot that you found the warp was too short to make it to the peg. It is always good to have another ball of yarn on hand - for warp and for weft.
Before you take your warp off the warping peg, go across every slot and make sure you have not missed any slots that needed a warp loop going to the peg. It is far easier now to fix this than later.
When tying on the warp to the warp apron rod - at the start of your warp or at the end - or in between - make sure your knots are strong and cannot come loose. A loose knot here will cause problems when you get toward the end of the weave. Double - even triple knots are good!
When you have tied your warp to the front beam, every bundle of warp that is tied on must be equal in tension to all of the others. Go along the bundles and the warp behind the heddle with two fingers and tap gently. Every bundle must feel the same tension. If not you will have problems when you weave. It can take multiple adjustments back and forth across the warp bundles to get them even. Time spent here with this will save problems later.
Once you have finished warping go and read my article on weaving a header. That is the next thing you have to do before you start weaving with your project yarn!