
You will need something that is NOT your project yarn to do this. Any scrap yarn can be used. It is best that it is thicker than your warp yarn. Some have even used rolled toilet paper to weave a header. The header is going to be removed when your weaving COMES OFF THE LOOM so you want to use something that is going to be easy to get out. I use something called Mason Twine. This is a polycord that is used in construction to lay out brickwork or pavement. It is inexpensive. It can be found at home stores like Home Depot or Lowes. Any hardware store should sell this. Walmart sells this in the aisle near hardware that has rope. You get a lot on a roll. It looks like this on the spool -

This is cord is slick. It slides easily and when it is time to pull it out, it just slides right out. When you cut this cord it is best to seal the end so that it does not unravel. Just put the end of the cord near a flame for two seconds and it will start to melt. That's it.
To measure how ,much you will need unwind the cord from the roll over your warp. Go across your warp eight times plus an extra inch or so each time to have enough cord. You now have enough cord to weave your header.
You are going to start about two or three inches above where your knots are on the warp beam. Adjust the tension on your warp to weave - same as if you were about to start weaving with your project yarn.
With the mason twine I find it does not stay on a stick shuttle very easily, so I use the stick shuttle to push the yarn through the open shed using the slot of the shuttle to hold the yarn as it goes through.
1. Open the shed. Take an end (doesn't matter which) of the header yarn or mason twine and push the end through the open shed to the other side with the end of a shuttle. Grab hold of the end as it comes through and pull it through. You want almost the entire length to come through the open shed. Leave a tail with the opposite end hanging out from the side you started on. Straighten the cord or yarn across inside the shed. Close the shed to neutral. DO NOT BEAT.
2. You are now on the other side of the warp with the long cord. Do as you did in STEP 1 going back the other way. Open the shed, push the end through getting most of the yarn out the other side. This time DO NOT pull the cord/yarn that goes over your warp end to the other side so that it tightens against the end warp thread. Instead leave a loop hanging out. DO NOT BEAT.
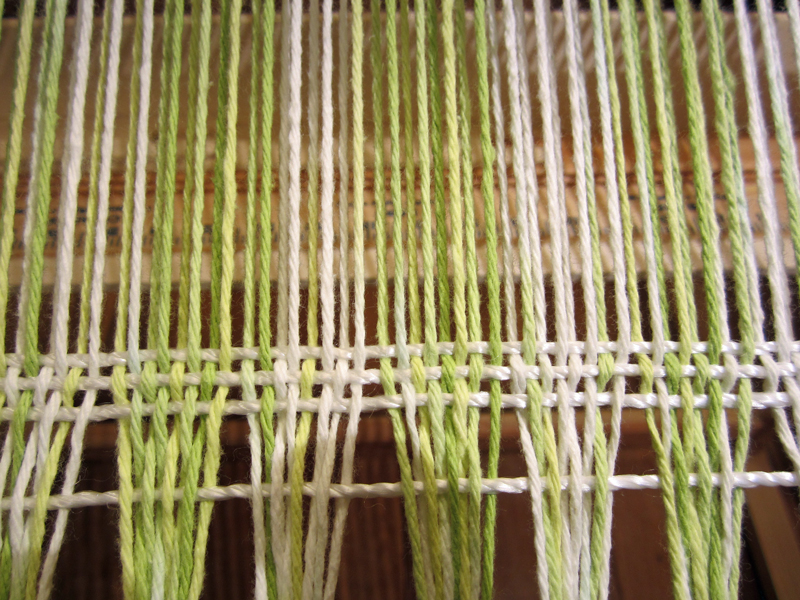
3. Repeat STEP 2 twice more but with the fourth row of this header yarn. Here is what this will look like at this point -

4. NOW you are going to BEAT all four rows at the same time. If the first row does not move, don't worry about it. Make sure the other three rows get up against each other and MAKE SURE YOU HAVE A STRAIGHT LINE OF CORD/YARN ACROSS THE WARP. You see below what this looks like now - and you can see that the warp yarns above this start of the header are coming to straight with even spacing. But not completely - yet!
5. Now you should be on the same side you started on when you started your header. You are now going to start weaving with the header cord or yarn normally.

I still leave a loop on the ends. I do not want the warp to be pulled in on the ends. I weave about four rows. Above you see the next row being put in - at an angle as you would do when you weave.
6. Keep weaving with your header cord/yarn until you see all of the warp nice and straight above the header to the heddle. I like to come back to the side I like to start to weave at. For me, I like to start on the right side of the warp with the heddle in the up position. If you start differently get your header yarn/cord to stop at the side you like to start weaving. If this means you have a lot of header cord/yarn left over, you can just leave it and it will wind up with the cloth or you can snip it off. Be very careful with scissors around your loom. You DON'T want to cut any warp threads.


When you look above you see nice straight warp and even spacing. You are now ready to weave with your project yarn!
No matter what pattern you will be using for your weaving, start with a header first - no pattern - just plain weave. If you don't weave a header you are going to find that your angled warp is going to make your beginning weave very uneven.
When I start weaving after I weave my header, I move up a couple of inches from the header before I start weaving with my project weft. I do this to leave a space between the weft and the header so that when I hemstitch the end of the yarn on the loom (hemstitching article coming) the wrap will pull together in the hemstitch and allow for a nice tight stitch.

Some have other ways do create a header. Some use sticks that are woven into the warp. This can also work. For an rigid heddle loom, I have found that weaving a header as in this article is easy - and works every time.